Latest Posts

Showing posts with label frontend. Show all posts
Hai all,

It's me again, Zahra. For this time, I will share with you about unit testing for front-end.

After I learned about react, My second task is I have to construct a unit test for sidebar which is part of front-end-things. Can you imagine? How could I make unit testing for front-end meanwhile I've just learned about react couples days ago? Wow. Very challenging, right? (yeah, at least for me)

Okay, first, trust me, I don't know what to do. Seriously. I couldn't imagine, how could you test your user interface? like seriously how? that was very abstract for me. Then... the first thing that I did is I asked my friends, Bthari and Glory. Glory's first task is to learn about react front-end testing (Aha! I know I asked the right person) They told me that allocateam's front-end system will be developed using React JS in React Boilerplate architecture. I decided to learn by doing. I open folder components, and there's a folder named "Button". That Button component is already provided from react boilerplate. I open unit test folder for the button that looks like this:


That what exactly I'm doing, I learned from that file, I searched one by one thing that I don't understand, see the pattern, trying to understand every detail that could help me to construct my unit-test for the sidebar. I really recommend to you all, if it looks really abstract for you in the first time, don't give up. Ask your friend (who already knew about it before). Googling is a good idea. Because, after I saw these button unit-test (who already provided by react boilerplate), I could understand it slowly. Nevermind, slowly but sure!

If you could see the detail, there's something called enzymeEnzyme is a JavaScript Testing utility for React that makes it easier to assert, manipulate, and traverse your React Component's output. You can open https://www.npmjs.com/package/enzyme if you want to know and explore more about enzyme.

The conclusion is, I really really thank PPL for letting myself exploring many new things that I never know before. Don't ever give up. Just keep going, keep searching, then you will find the way!

Want some motivation? Look!


On the left side, that's the sidebar that I made! It just has to start with the unit test first and... do the styling, yeah!
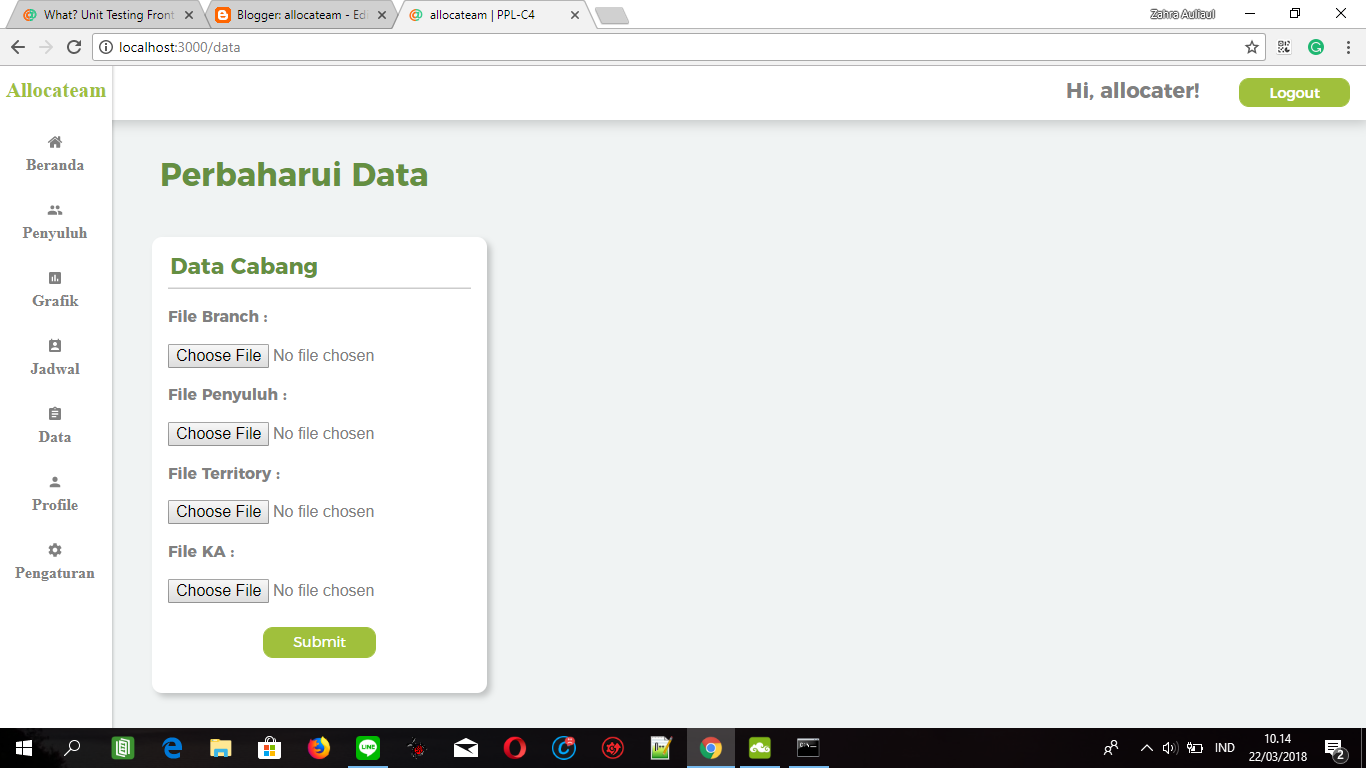

and yeah, this too..

For the styling, I did it like this:


Just trust your self first. If I can, so do you! :)

That's all for this post. I hope you all always happy with whatever you all do. Do not ever give up, okay? See ya!


Hello again, allocaters, Bthari is back here to tell you about our branding! 😉 Before we get into our guidelines, let's dig deeper into a topic that related to guidelines, have a guess?

It is branding.

The web, with our own branding, will convey and determine what user feels. And it emphasizes what company we actually are, is it a fun and kind company or elegant and serious company? The choice itself is not up to the designer, it defined by the market targeted (ex: a retiring employee or easy-going teenager) because every community out there has their own preference. A good branding can connect to the customer on the emotional level and it will set us apart from the competitor. 

Guidelines, apart from content and wording, is some element of branding. 

Every app needs its own guidelines, why? First, there we got a need for branding in a competent company; second, it helps to standardize every component, choice, and decision; last, but not least, it's painful for a developer who doesn't understand design to think how the app should looks if we didn't have guidelines.

Guidelines also helped users in many ways. It will help users to navigate in our application because guidelines determine how components behave and looks (the same way at every place), it will quicken user learning's speed. 

This guideline was made by me and Zahra, another hipster in allocateam. You can go to our Figma in page two for our full view on our guidelines: https://www.figma.com/file/N9cfmMyWn293f0SUl7KXhmlM/Mockup-PPL-Mapan?node-id=3%3A0

P.S. Here a snippet

Thank you for reading, hope it helps! :)
Hai allocaters! :)

Here I am again, Zahra, one of your lovely hipsters from allocateam :)

Like I said before, I will share with you guys every week about what I have done, what I have learned and anything that I can share with you guys from PPL.

If you guys interested to learn about react, this post (maybe) will help you a little (I hope so). This post can help you guys to know the intro about react. No, I won't say that it would be easy, but I will let you guys know how I learned about react. 

For the intro, I never ever know about react before.  The first time I knew about react is recent, in the PPL class. That's why for my first task is to learn about react. I really learned about it from the start. The good thing is, I found interesting web which is https://www.codecademy.com. Codeacademy will give you some explanation about React. After that, it will give you instructions and you have to code it by your self. 

On codeacademy, ReactJS: Part 1 will be divided into 3 parts. First, You will learn about JSX, and it includes the intro and advanced JSX. Second, you will learn about React Components and the last is Components Interacting. 

On the intro, they present you about JSX, a syntax extension for JavaScript that was written to be used with React. JSX code looks a lot like HTML. Then, I learned about JSX Elements. JSX Element is a basic unit of JSX. Here's an example of a JSX element:

<a> Hello guys, We are allocateam!</a>

This JSX element looks exactly like HTML. The only noticeable difference is that you would find it in a JavaScript file, instead of in an HTML file. Other than that, you guys will learn about attributes in JSX. JSX elements can have attributes, just like HTML elements. A JSX attribute is written using HTML-like syntax. Example of it is: 

<a href="http://www.allocateam.com"> Hello guys, We are allocateam!</a>

href="http://www.allocateam.com" is example of attribute in JSX. href is a name and the http is a value of the attribute. A single JSX element can have many attributes like HTML. You will also learn about nested, outer elements, rendering and passing variables in JSX. Then you will move to the React Component section. 

React applications are made out of codes that are responsible for one job called component. before you make components, you have to import React and ReactDOM library first. There is one class of JavaScript called React.Component, you have to use it for making your own component class. You can make a class by using this code:

class YourComponentNameGoesHere extends React.Component {}

You do really have to open codeacademy because it will tell you a lot about Component Class Instructions and all about rendering in React. Remember, you have to code all the instructions all by your self.

That all about the intro of React. You want to know more? Trust me, the time that I took for studying about react is so worthy. I thank Codeacademy for the good things on there! 

Thank you! See you on the next post!

pict source: https://www.youtube.com/watch?v=yc8fg7gWbBA


What's up, allocaters?

Back with me again, Glory. Do you ever hear about another version of Twilight-Saga in Front-End Technologies? Here I want to introduce you to the awesome Saga that maybe will be my (also your) nice friend for developing software, called Redux-Saga

Trust me that Redux-Saga is very amazing! I can't describe how amazing it is with words, but let's try it together with a simple example. In this occasion, we will try to do Redux-Saga API Fetching. The API we are going to use is allocateam's Hello World's API. So, before we start it, make sure that you already created a react-app first. Then, let's do it together step-by-step!

1] In folder containers, due to Redux-Saga will be associated with containers, create a container named HelloWorld  so we will code everything inside the HelloWorld container to fetch allocateam's Hello World's API. 

2] Inside the HelloWorld container, create index.jsactions.js, api.js, sagas.js, store.js, Home.js, and a folder named reducers, inside the reducers, create data.js and index.js.

3] HelloWorld/actions.js

4] HelloWorld/api.js

5] HelloWorld/sagas.js

6] HelloWorld/store.js

7] HelloWorld/Home.js

8] HelloWorld/index.js
*) You can change PageTitle with h1 or another related HTML component.

9] HelloWorld/reducers/data.js

10] HelloWorld/reducers/index.js

11] Go to the terminal then run this command: npm start then open your browser and go to localhost:3000 

Ta-da! You will see Hello World on your screen. The word "World" comes from the result of Redux-Saga API Fetching! You can use Redux-Saga for fetching another API too. Even, not only fetching, there are still many activities you can do with Redux-Saga, such as API Post (we will discuss it later!) So cool, isn't it?

Hope that this simple tutorial will be helpful. See you on another post, allocaters

Hey, everyone! Glory is back. Now, let me share about my exciting journey of migrating from the one who always works on the back side to be the one who should perform on the front side!

Basically, in every group project I have done during my uni life, I always got the responsibility to develop the back-end system of some applications. And I admittedly really interested about any back-end technologies, so if I have leisure times, I often try to learn about another back-end technology that I haven't learned before. Those reasons bring me to be the careless one about front-end things.

But, in this PPL journey, I think this is the right time to try something outside my truly comfort zone. Since my team is dominated of back-end people, it increasingly strengthen myself to dare to re-dealing with front-end things. And now.. I'm here, with some front-end tasks to be done 😂

To you guys who already comfortable with back-end things and really don't want to have an affair with front-end things, if the reason is only limited to "I'm lazy to learn", here I want to invite you guys to learn with me together. I'm still also a newbie, but it isn't that bad, guys, please.

The first 2 days of learning front-end, specifically I chose to learn React JS, because this framework will be used for allocateam's project, I followed the tutorial given by codecademy (I'll put the link on the reference section below). I love learning from that site because it give the materials step-by-step clearly and easy to follow. That site isn't only serve the course about React JS, but also some interesting courses mostly in tech field. Very recommended for you tech-guys! After finished the course, I tried to practice about what I have learned by creating a simple user interface web and.. the result is good enough! Really proud of myself that time 😎 You can try yourself and I'm sure you will get the pride I felt that time.

Then, I was about to start the development of allocateam. My friend, Bthari, who already has more knowledge about front-end things, told me that we will use React Boilerplate to help our front-end development easier. I ask her, "Hah? What's React Boilerplate?" Then she answered, "Kind of framework of React." The conclusion is "React is a JavaScript's framework. Boilerplate is a React's framework. So, the boilerplate is framework of framework!!?!" Really confusing huh.

But, I'm trying to not complaining things. I have to learn more. I believe that learning is never wrong. After took some times to learn the boilerplate, evidently, boilerplate is very amazing! Just like after we learn a new framework, although it will be hard in the beginning to understand the architecture, after we understand, it has a lot of helpful things inside. Boilerplate makes us easier to manage our component, container, even unit test! Everything is already built-in the architecture, so we don't have to install every dependency that we are about to use. Bthari also said that there are a lot of React Framework out there. Boilerplate is only one of them. Wow! So exciting, right?

One thing, I'm really grateful that I dare to take the decision to re-dealing with front-end things again. I'm happy that I learn a lot of exciting useful knowledges. I wish that I can learn more and more things ahead during the development of allocateam. Wish me luck everyone! And stay tuned for more another exciting story from every allocateam's member.


Hi, guys! :)

You can call me Tari, I’m one the member of the very awesome team allocateam.

Before we get into, why redux, why not the other thing, let me tell you first about what it is actually. If React is the framework for our javascript, then what the use of Redux? As the title said, Redux will handle the complex state of an object.

With the UI of website getting improved all the time (adding some component and more complex things), we also asked to keep the state of the object are on track as best as possible. Yet, at some point, the state tend to become questionable as we asked ourself, “How the list have this kind of state?”

This is where Redux come! 

Redux will put all the state in a store AND we will only have on a tree in our apps that store all of our states. Maybe you think it’s kinda cool, but it’s going to be big and hard to read; stay calm guys. We will get into that because definitely, Redux have something to handle it (psst, it’s call reducer ;))

Imagine that you write your app’s state as a plain object, this object is like a model but it has no “setter”, so the only way to change part of it is to dispatch an action. Using this concept, we know how and why if something has changed. Next, we’ll need the reducer to tie the action and state object—as a reducer will be hard to maintain for a big app, then we can write smaller function managing part of the state and have another reducer that organizes all the states in our app.

Last, if you want to know more about Redux you can check in its official website, here it is—and this one writing with a cartoon which I think explain the flow a lil bit better. 

Hi Everyone! Thanks for visiting our blog :)

Let me introduce my self, 

My name is Zahra Auliaul Ummah, I'm being part of PPL-C4 team or we (as a team) usually call it allocateam

Actually, me and all of my friends (in allocateam) will give you all some cool story about what we all have learned every week for every sprints that we do. This is my first post in this blog. Can you guess what kind of story that I will share to you this time? So, for my first sprint-task, I chose to learn about React. 

We chose React (as a programming language) for developing our website's front-end system. React is a JavaScript library for building user interfaces. Why React? As previously mentioned on this website, React is declarative because you only need to design simple views for each state in your application and React will efficiently update and render just the right components when your data changes. React is also component-based because we can build encapsulated components that manage their own state, then compose them to make complex UIs. 

After knowing about that facts, I decided to search many website to help me (as a beginner) understand more about React. And then, yeah!, I found this website: https://dumbways.id/courses/enrolled/225695. It's free! You just have to sign up, make account and watch the video. From that website, The first thing that I learned is how to do the installation correctly and easily. After that, I learned many things about component, functional component, child component, component lifecycle, props, events and state in React. It was really-really interesting! Oh ya, you can also look for this website: https://reactjs.org/tutorial/tutorial.html, it will give you the documentations and tutorials about React itself. 

I hope what I wrote above can help you guys to learn about React (like I did, recently). If you have another good website to learn React, please comment down bellow.

See ya on the next post! :)

Hi, everyone! I'm Glory, the most beautiful hacker of all allocateam's hackers 👯

In this post, I want to share about what I have done in the beginning of the first sprint. For my very first task, I decided to choose to learn about front-end testing to support the TDD implementation for our development ahead.

allocateam's front-end system will be developed using React JS in React Boilerplate architecture. There are 2 main testing supported by Boilerplate that make us easier to test our front-end things. First, Unit Testing using Jest. This test can be used for the practice of testing the smallest possible units of our code and functions. We run this test to verify that our functions do the thing we expect them to do. Unit Testing is very useful to test Redux actions and reducers. 

Due to we talk about full scope of front-end development, beside of testing our functions, we need to test about the component we create. That's the reason why we need the next kind of testing, that is, Component Testing. We can use shallow rendering and enzymes, that also supported by Boilerplate. We use them to make sure that every component needed are available on the view layer of our application.

For more technical things about how to implement those tests, go visit the official repository of React Boilerplate here: https://github.com/react-boilerplate

All of those tests will be very helpful for our front-end development process for sure. Due to using TDD approach, don't forget to always Test First 😇


That's all from me. See you on another post!