Latest Posts

Showing posts with label unittest. Show all posts

Hello guys, it's me again and again, Wicaksono as a backend engineer from Allocateam. This time I want to share you about our method to test-first our database in development. TDD is one of our project requirement, so we must apply TDD in every aspect of our project, and it's kinda frustrating for me as one of my tasks is to implement the database models. There are a lot of pros and cons when searching for the idea of implementing the TDD for database development, there are more cons written on the internet though! 

Most people said that the idea of TDD is great, but implementing it in the database is hard, impractical, and doesn't worth it (comparing the benefits and the efforts). According to Greg Lucas who has been working on SQL and database related works for more than 14 years, he said that, yes it is hard, and even in most agile teams, TDD for databases, if implemented at all, is often the last thing to be put into action. Nevertheless, he also pointed some of the advantages of implementing TDD and why we should bother. You can read more about his writing here.

Thanks to his writing, now it's not about is it possible or not. It's now about how can we implement it on our project. Following his idea in his next article, I kinda figure it out how.

On the previous article, I only use built-in python unittest for testing, but now I think I need an extension called flask-testing to help me. Install it using pip with:

1
pip install Flask-Testing

So here is the example case, I want to create a profile model that contains the name (required) and a phone number. Quite simple right? Well, you can watch our repo for our real implementation of the database models TDD in a more complex structure.

Our project uses SQLAlchemy as our ORM and we placed our model on a file called models.py. Now let's make our model stub first:

1
2
3
4
5
6
7
8
from flask_sqlalchemy import SQLAlchemy


db = SQLAlchemy()


class Profile(db.Model):
    id = db.Column(db.Integer, primary_key=True)

This is how I create our stub for our models, passing it none will cause unreadable error telling the model is broken, so I put a primary key as it's a must-have attribute for a model class. Remember, this is only a stub and we haven't implement anything for the profile model.

Now let's create our test:

 1
 2
 3
 4
 5
 6
 7
 8
 9
10
11
12
13
14
15
16
17
18
19
20
21
22
23
24
25
26
27
28
29
30
31
32
33
34
35
36
37
38
39
40
41
42
43
44
45
46
47
48
49
50
from flask import Flask
from flask_testing import TestCase
from models import db
from sqlalchemy import exc

from models import (
    Profile
)

class TestDatabase(TestCase):

    def create_app(self):
        app = Flask(__name__)
        app.config['TESTING'] = True
        app.config.from_object('config.TestingConfig')
        app.config['SQLALCHEMY_TRACK_MODIFICATIONS'] = False
        db.init_app(app)
        return app

    def setUp(self):
        db.create_all()

    def tearDown(self):
        db.session.remove()
        db.drop_all()

    def test_profile_ok(self):
        profile = Profile()
        profile.name = 'Wicaksono'
     profile.phone = '08111710107'
        db.session.add(profile)
        db.session.commit()

        self.assertIn(profile, db.session)

    def test_profile_no_name(self):
        profile = Profile()
     profile.phone = '08111710107'
        db.session.add(profile)

        with self.assertRaises(exc.IntegrityError):
            db.session.commit()

    def test_profile_no_phone(self):
        profile = Profile()
        profile.name = 'Wicaksono'
        db.session.add(profile)
        db.session.commit()

        self.assertIn(profile, db.session)

Here is the explanation:

create_app: is to create an app with a custom configuration. Sometimes we need to define a different configuration for our testing environment, here, for example, I define a different testing database address so it doesn't create a conflict with my local development database.

  • setUp: is to tell the test how we initiate our app, here I tell the test to create the database schema according to the model.
  • tearDown: is to tell the test what should it do after it done testing, here I tell the test to remove the session and destroy all of the database schemas inside the test database.
  • test_profile_ok: is to test if we passed all of the attributes for the profile model, the model should be successfully committed.
  • test_profile_no_name: is to test if we didn't pass a name for the profile model, the model should raise IntegrityError at commit.
  • test_profile_no_phone: is to test if we didn't pass a phone number for the profile model, the model should be successfully committed because the phone number is not a must.
When we run the test we should expect all of those tests would fail, if it's, that our [RED]. Now let's implement our model:

1
2
3
4
5
6
7
db = SQLAlchemy()


class Profile(db.Model):
    id = db.Column(db.Integer, primary_key=True)
    name = db.Column(db.String(15), nullable=False)
    phone = db.Column(db.String(15))

If our tests have passed after we run it when we have implemented the model, that means our model have met our criteria. That's our [GREEN], well done!

It's quite confusing and time taking for me and maybe you guys to reverse our thinking to apply test-first for more complex model structure, but it just needs some practice! On every next model that I have to implement with TDD, it getting faster and easier to do, so keep it up! Hope my experience will help some of you guys, see you next time!
Hai all,

It's me again, Zahra. For this time, I will share with you about unit testing for front-end.

After I learned about react, My second task is I have to construct a unit test for sidebar which is part of front-end-things. Can you imagine? How could I make unit testing for front-end meanwhile I've just learned about react couples days ago? Wow. Very challenging, right? (yeah, at least for me)

Okay, first, trust me, I don't know what to do. Seriously. I couldn't imagine, how could you test your user interface? like seriously how? that was very abstract for me. Then... the first thing that I did is I asked my friends, Bthari and Glory. Glory's first task is to learn about react front-end testing (Aha! I know I asked the right person) They told me that allocateam's front-end system will be developed using React JS in React Boilerplate architecture. I decided to learn by doing. I open folder components, and there's a folder named "Button". That Button component is already provided from react boilerplate. I open unit test folder for the button that looks like this:


That what exactly I'm doing, I learned from that file, I searched one by one thing that I don't understand, see the pattern, trying to understand every detail that could help me to construct my unit-test for the sidebar. I really recommend to you all, if it looks really abstract for you in the first time, don't give up. Ask your friend (who already knew about it before). Googling is a good idea. Because, after I saw these button unit-test (who already provided by react boilerplate), I could understand it slowly. Nevermind, slowly but sure!

If you could see the detail, there's something called enzymeEnzyme is a JavaScript Testing utility for React that makes it easier to assert, manipulate, and traverse your React Component's output. You can open https://www.npmjs.com/package/enzyme if you want to know and explore more about enzyme.

The conclusion is, I really really thank PPL for letting myself exploring many new things that I never know before. Don't ever give up. Just keep going, keep searching, then you will find the way!

Want some motivation? Look!


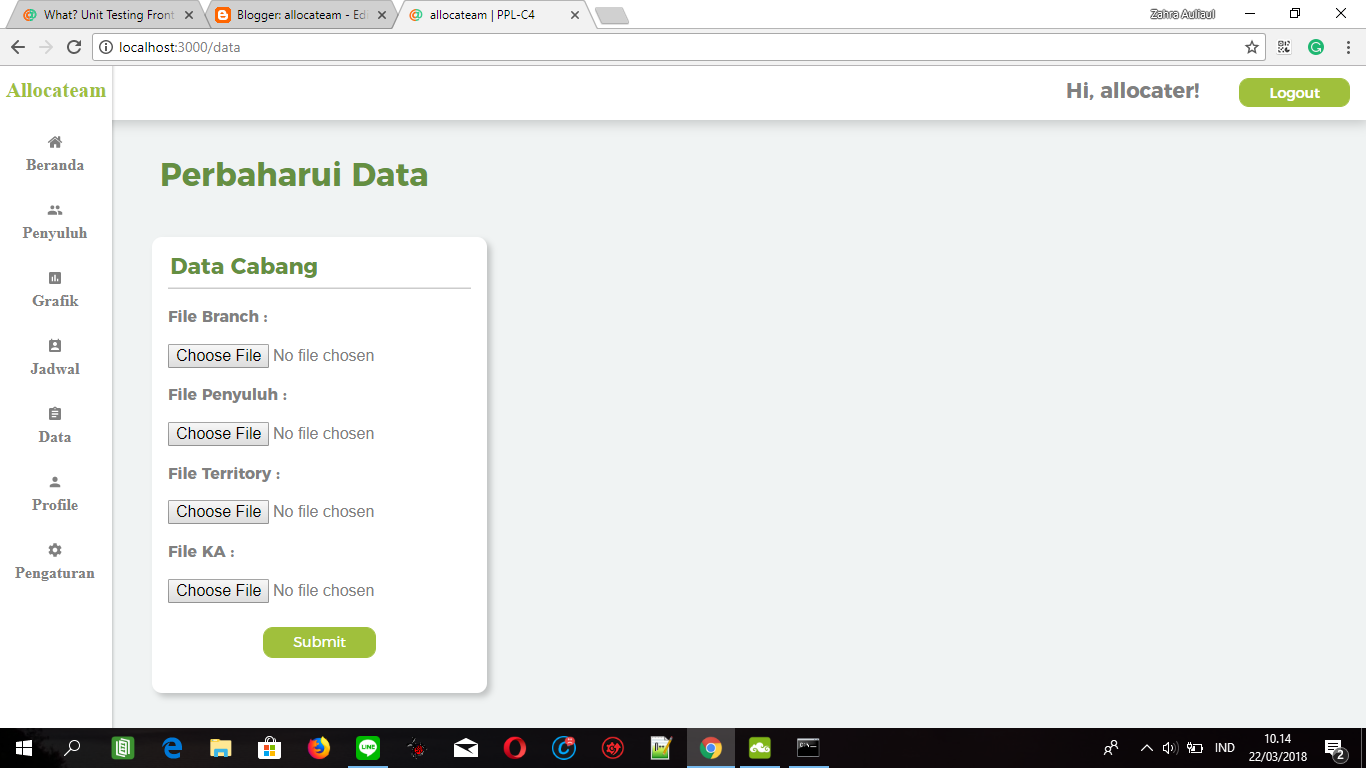
On the left side, that's the sidebar that I made! It just has to start with the unit test first and... do the styling, yeah!


and yeah, this too..

For the styling, I did it like this:


Just trust your self first. If I can, so do you! :)

That's all for this post. I hope you all always happy with whatever you all do. Do not ever give up, okay? See ya!


Hey guys! It's me again! The, you know who (and if you don't know, read who's the author please).


I've been working on test heavy task on this project lately and now I want to share you guys on how I solve one of my problems, how to mock file input (in this case CSV)? It started when my task requirement needs me to create a method that validates a CSV file input whether it contains the valid attributes or not. On our test driven development approach, I need to create the test and stub first to construct a clearer picture of what should I have to do right? But the test is a bit tricky because the input of the implementation is a file passed from the frontend-kind-of-form via the API. So, how do I test the method? How do I get the data?

Lemme think for a second.

Well, for sure, I need to mock the file, you know, create a fake file that imitates the real data. But, in what form? I don't want to write a real CSV file into our project directory, can I just make an object? Like, file object?

After a short research on the internet, StringIO is a python pre-installed module that I'm looking for! In short, StringIO a file-like object (buffer), so I can use it to create a CSV file-like object.
Now what?

It's 101 time!

StringIO is a package from io, don't forget to import the package.
We're going to construct a CSV data, what do we need? Python also provides us a CSV package for constructing a CSV data, also you can explore Pandas for more advanced CSV creating tools using dataFrame.

1
2
import csv
from io import StringIO

Writing file to StringIO is quite similar to writing a file to file output, but one you might notice that StringIO is opened at instantiation so you don't need to open it first. For the sake of simplicity, I will only demonstrate the easiest CSV data mock requirement on our project, territory.


1
2
3
4
file = StringIO()
writer = csv.writer(file)
writer.writerow(['id', 'Province', 'City', 'Subdistrict', 'Village'])
writer.writerow([1, 'DKI Jakarta', 'Jakarta Timur', 'Duren Sawit', 'Malaka Jaya'])

Done! Easy right? But not so fast. If you try to take the value from the StringIO literally, you will get, nothing! But why?

I will explain just a little bit. So you can imagine the way StringIO works is like you writing a file on a notepad. It has a pointer pointing at the end of a file so it can append new write input to the next line. How StringIO read the file is quite similar, it will try to read the data ahead. So at the current state, what data is ahead of our pointer? Nothing. So you have to move the pointer backward and in short, move the pointer to the very first line so we can read all of the data. Don't be panic, it just a line of code, luckily!


1
file.seek(0)

Now our mock is ready to use! Just put it into our stub, write our expected return on the test, and assert the result. Job well done!
Here I summarize what can we learn from this post and a reference for anyone who thirsts for knowledge:
Wait a minute, but isn't there any package out there that will do some magic to solve this problem?

There are many ways to mock a file, and there are also some packages that will help you, but I still could find any magic that satisfies my requirement because I need a customized CSV structure with unusual value. So better make it by my self that wasting my time searching the web.

That's it, that's it. See you later guys!


Hello everyone, here I am again, Rafiano. I wanna tell all of you that I was screaming all day all night "WHY CREATING TEST IS SO EFFIN' DIFFICULT?!". Yes, literally. You could probably see my commit in AT-1 branch how desperately I am periodically change my test code for hours, during the night. 

It all changed this morning. Thanks to a very clear explanation about back-end testing, start from creating mock csv to how to create a proper test by allocateam's best lead engineer, Wicaksono (Well he don't want to admit that he is tho lol). I can't imagine how many more hours would I probably have to spend if there's no explanation by him.

So, it all started when I creating this one, haven't used mocker yet and I implement the logic (using selection and repetition) as a test to check whether it contains all the key or not:

class TestParser(unittest.TestCase):
def setUp(self):
self.app = mario.app.test_client()
self.app.testing = True
def test_parse_return_not_none(self):
# TODO use mocker
data = p.parse(None, None)
self.assertNotEqual(data, None)
def test_parse_return_correct_format(self):
# TODO use mocker
data = p.parse(None, None)
correct = False
if "res" in data:
if data["res"] is not None:
filled = True
for i in data["res"]:
if (i["branch"] is not None) and (i["data"] is not None):
all_data = True
for key in i["data"]:
# cek semua atribut
if i["data"][key] is None:
all_data = False
break
if not all_data:
filled = False
break
correct = filled and all_data
self.assertTrue(correct)

Long story short, I was keep refactoring the code like change the test to check whether the output is a valid json or not, is a dict or not, and so on and so on. Until this morning, Wicaksono tell me that it's not how you create a test. He told me that a test simply call a method, pass the proper arguments (using mocker for this case ofc), and simply assert with an expected output. He also told me how to create a mock csv for this case. Now, my testing is what a test should be (thanks again to my friend, Wicaksono). Here's my test now:

class TestParser(unittest.TestCase):
def setUp(self):
self.app = mario.app.test_client()
self.app.testing = True
def test_parse_return_valid_format(self):
file_names = list(validator.TABLE_COLUMN.keys())
files = []
mock_data = {
'branch': [1, 'Tebet', 'Jl. Tebet Raya', 'Rafiano Ruby',
'08131651104', [1], [1]],
'penyuluh': [1, 'Wicaksono Wisnu', '08111710107'],
'territory': [1, 'DKI Jakarta', 'Jakarta Timur',
'Duren Sawit', 'Malaka Jaya'],
'ketua_arisan': [1, 'Bthari Smart', 1, 'Jl. Bunga Rampai',
-6.198495, 106.837306]
}
for filename in file_names:
file = StringIO()
writer = csv.writer(file)
writer.writerow(validator.TABLE_COLUMN[filename])
writer.writerow(mock_data[filename])
files.append(file)
data = p.parse(files[0], files[1], files[2], [files[3]])
expected_output = {
"res":
[
{
"branch": "Tebet",
"address": "Jl. Tebet Raya",
"branch_manager":
{
"name": "Rafiano Ruby",
"phone_number": "08131651104"
},
"penyuluh":
[
{
"name": "Wicaksono Wisnu",
"phone_number": "08111710107"
}
],
"territory":
{
"province": "DKI Jakarta",
"city": "Jakarta Timur",
"subdistrict": "Duren Sawit",
"village": "Malaka Raya"
},
"ketua_arisan":
[
{
"name": "Bthari Smart",
"address": "Jl. Bunga Rampai",
"latitude": -6.198495,
"longitude": 106.837306
}
]
]
} }
self.assertEqual(data, expected_output)

Finally, now I can stop doing this task and can be more productive for my next task(s).

So that's all for me now, Ciao!

Image source:


Hi Everyone!

I'm Wicaksono, one of the hacker of allocateam development team.
Time to share about what I've learned like all of my mates right?

This time is about Backend Test Driven Development. We use Flask as the backend framework and the steps to test it is quite simple. Here is the overview:

Write the test - We create test first to break down our app requirements [RED].
Run the test - Obviously, the test should fail because we haven't code anything related to it.
Write the code - With an objective to make all the test pass.
Run the test (again) - If it passed, we can be sure that our code has met the requirements [GREEN].

That's all! Pretty easy for sure!

Because we think our application is not really that complicated to test, we won't use any Flask extension to perform the test, instead, we use unittest package that comes pre-installed with python.

The implementation is quite straightforward as the Flask documentation is well written, so you can read here for more in-depth flask testing knowledge and how-to.

So let's go back to our business on how we implement simple TDD our backend project. For today example, we want to replicate our way to make our RESTful hello world API.

First, let's create our test! Oops, but our test need to get a result or response from a method that we haven't create yet. At least we need the method name, what kind of input it needs, so we can construct our test right? That what stub is for. We can create an empty and unimplemented method called stub, so we can draw more picture about our requirements. We placed our restful API on resources/api that will be imported by our main app. Here is the code:

1
2
3
4
5
6
from flask_restful import Resource


class HelloWorld(Resource):
    def get(self):
        pass


Simple right? Just pass it! So what it's used for?
Because of this kind of thing, now we can be sure that our method:

  • Called Hello World
  • Has a route which is /api/v1/hello
  • Only use get request
  • No input

We still don't know the logic is because we haven't constructed what kind of output that we need, which we'll define on our test.

Now we can create our test easily! We put our tests into a file called tests.py. Here is the code:

 1
 2
 3
 4
 5
 6
 7
 8
 9
10
11
12
13
14
15
16
17
18
19
20
import unittest
import json
import mario


class TestApi(unittest.TestCase):

    __api_path = '/api/v1'
    def setUp(self):
        self.app = mario.app.test_client()
        self.app.testing = True
    def test_hello(self):
        response = self.app.get('{}/hello'.format(self.__api_path))
        self.assertEqual(
            json.loads(
                response.get_data().decode()), {'hello': 'world'}
            )

if __name__ == "__main__":
    unittest.main()

We create a single class for a specific purpose. For this example, we create a TestApi class to test all API calls on our backend service.

Our setUp() method is for, you know, set up. For now, we only create a new test client.

Our API needs to return something right? We have constructed the stub before so we can be sure which API and method that we'll use. Now, whatever that method will do, I want its input to match our expectation right? That's what tests are for!

Here We put our method result on a variable called 'result'. Our requirements said that our method needs to return a JSON string with key 'hello' and 'world' as the value. So we need to compare our method output with our expected output using assert and if it's the same, it shall pass.

Let's run the test!

BOOM! What's wrong?

The output doesn't match? Your test just failed? Have you realize (I know you have, I just want to make this post more dramatic), for all the time you have spent from the beginning, you only make the test. You haven't created the implementation. Now it's time for you to do the "work". All of the stubs and tests you have made will guide you though. Luckily our requirements only need us to return that JSON object literally without any processing. You know what to do. Here is the code:

1
2
3
4
5
6
from flask_restful import Resource


class HelloWorld(Resource):
    def get(self):
        return {'hello': 'world'}

Done, it's done. Run the test again. It should pass now. If it's not, don't be panic, take a breath and read again :)

Fun, right? See ya on the next post!

Hi, everyone! I'm Glory, the most beautiful hacker of all allocateam's hackers 👯

In this post, I want to share about what I have done in the beginning of the first sprint. For my very first task, I decided to choose to learn about front-end testing to support the TDD implementation for our development ahead.

allocateam's front-end system will be developed using React JS in React Boilerplate architecture. There are 2 main testing supported by Boilerplate that make us easier to test our front-end things. First, Unit Testing using Jest. This test can be used for the practice of testing the smallest possible units of our code and functions. We run this test to verify that our functions do the thing we expect them to do. Unit Testing is very useful to test Redux actions and reducers. 

Due to we talk about full scope of front-end development, beside of testing our functions, we need to test about the component we create. That's the reason why we need the next kind of testing, that is, Component Testing. We can use shallow rendering and enzymes, that also supported by Boilerplate. We use them to make sure that every component needed are available on the view layer of our application.

For more technical things about how to implement those tests, go visit the official repository of React Boilerplate here: https://github.com/react-boilerplate

All of those tests will be very helpful for our front-end development process for sure. Due to using TDD approach, don't forget to always Test First 😇


That's all from me. See you on another post!